Difference between revisions of "3D Printed Strobe Ringlight"
(Creation of article) |
|||
| (13 intermediate revisions by the same user not shown) | |||
| Line 4: | Line 4: | ||
==System Overview == | ==System Overview == | ||
The system consists of a power supply and trigger, a 3D printed mount for the circuitry, a power source, a 3D printed structure to mount the strobes on, and the strobes themselves. | The system consists of a power supply and trigger, a 3D printed mount for the circuitry, a power source, a 3D printed structure to mount the strobes on, and the strobes themselves. | ||
| + | [[Image:Ringflash_Strobe_Side.jpg|350px|left]] | ||
| + | <br clear="both"> | ||
| + | |||
| + | == Dispo Cam Overview == | ||
| + | Disposable cameras use a simple but extremely clever switching converter to charge the 330V capacitor from a 1.5V source. They use a very small pulse transformer to generate the large ionization voltage required to start conduction of the xenon within the flash tube. Power converter startup is accomplished via a pushbutton, and in some models proceeds until the flash is fired and in some models the button must stay depressed until the capacitor is sufficiently charged, both models indicate capacitor voltage via an LED or gas lamp indicator. To save money, the trigger is a simple pair of copper contacts that complete the circuit from the pulse transformer to ground. | ||
| + | |||
| + | [[File:DispoFlashBack.PNG|350px|left]] | ||
| + | [[File:DispoFlashFront.PNG|350px|left]] | ||
| + | <br clear="both"> | ||
== Power Supply and Trigger == | == Power Supply and Trigger == | ||
| − | For now these will just be the disposable camera board with the beefiest transformer that I can find. Charge times will be slow because there will be three capacitors instead of just the usual single cap. Triggering | + | For now these will just be the disposable camera board with the beefiest transformer that I can find. Charge times will be slow because there will be three capacitors instead of just the usual single cap. |
| + | |||
| + | Triggering is accomplished by an SCR tied to the PC-Sync output of the camera. Due to the sensitivity of the gate of an SCR/Thyristor, it is necessary to buffer this with a PNP transistor. A 2N3906 is used to draw current from the SCR's base and trigger conduction when the sync signal goes low. | ||
| + | |||
| + | [[Image:DispoCamTrigger_schem.png|750px|left]] | ||
| + | [[Image:Ringflash_Strobe_Electronics.jpg|350px|left]] | ||
| + | |||
| + | <br clear="both"> | ||
| + | |||
| + | == Strobes == | ||
| + | The strobe and capacitor assembly have been harvested from the disposable cameras. The capacitor is glued to the strobe housing with locktite flexible adhesive and the same glue is used to secure the strobes within the structure. Inductors are used to isolate the capacitor/strobes from the power supply to avoid tubes from stealing each other's pulses and exploding. | ||
| + | [[Image:Ringflash_Strobe_TubeClose.jpg.JPG|350px|left]] | ||
| + | [[Image:Ringflash_Strobe_View1.jpg|350px|left]][[Image:Ringflash_Strobe_View2.jpg|350px|none]] | ||
| + | <br clear="both"> | ||
| + | ===Brightness Calculation=== | ||
| + | Energy in flash | ||
| + | (1/2) * 120e-6 * 330^2 = 6.534 joules | ||
| − | + | Assume somewhat poor efficiency of 30 Lumens per Joule | |
| − | + | 6.534 * 30 = 196 Lumens per strobe | |
| − | + | x3 strobes = 588 Total Lumens | |
= Structure = | = Structure = | ||
== Ring == | == Ring == | ||
The ring structure was based on the LED version but redesigned to include the proper hole pattern. | The ring structure was based on the LED version but redesigned to include the proper hole pattern. | ||
| − | [[Image:Ringflash_V1_Strobe_3ch_2mm_CAD.png|350px|left]]<br clear="both"> | + | [[Image:Ringflash_Strobe_Front.jpg|350px|left]][[Image:Ringflash_Strobe_Back.jpg|350px|none]] |
| + | [[Image:Ringflash_V1_Strobe_3ch_2mm_CAD.png|350px|left]] | ||
| + | <br clear="both"> | ||
== Mount == | == Mount == | ||
| − | I | + | Currently the trigger SCR and interfacing PNP transistor are piggybacked onto the stock power supply and trigger board mounted to the topmost strobe. However, the AA battery and holder are currently floating with no home. I would like to design a buck converter to take a lipo down to the required 1.5V or re-design the power converter to run well off of 3.7V as AA batteries are bulky and do not perform well under cold conditions. |
| + | |||
| + | =Results= | ||
| + | <flickr>13678754815|thumb|left|The light is pretty even for just three lights</flickr><br clear="both"> | ||
| + | It's WAY too bright for macro work, though it would work well for classical/portrait photography. At the very least a piece of printer paper has been placed over each strobe to dim it slightly. I really need to add a quench circuit to redirect and interrupt the current path slightly with a programmable (if manual) delay. A 555 pulse generator could work well here. | ||
| + | |||
| + | [[Image:DischargeCurrent.png|thumb|left|Discharge current plot for future IGBT control. Looks like the discharge is way too short without an inductor]] | ||
| + | <br clear="both"> | ||
| + | |||
| + | =Slideshow of Images Taken Using The Ringflash= | ||
| + | <html><EMBED src="http://www.flickr.com/apps/slideshow/show.swf?v=71649" width=800 height=400 type=application/x-shockwave-flash flashvars="offsite=true&lang=en-us&page_show_url=%2Fphotos%2Fnebarnix%2Fshow%2F&page_show_back_url=%2Fphotos%2Fnebarnix%2F&user_id=70259473@N00&tags=ringflash" allowfullscreen="true"></EMBED></html> | ||
Latest revision as of 12:31, 12 August 2020
Problem Statement
This project is a fork of the previous 3D_printed_LED_Ringflash project. I want actual strobes for when I want crystal clear, bright, short duration burst of light. This is especially useful for deep macro handheld work. I want to use disposable cameras for everything except the camera interface which will require SCRs or transistors.
System Overview
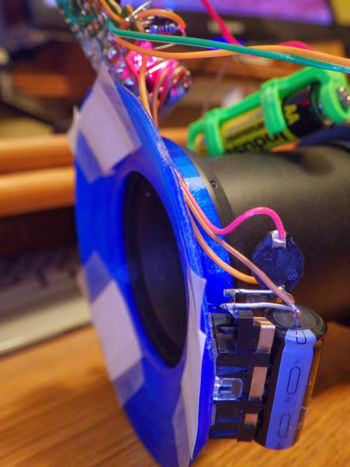
The system consists of a power supply and trigger, a 3D printed mount for the circuitry, a power source, a 3D printed structure to mount the strobes on, and the strobes themselves.
Dispo Cam Overview
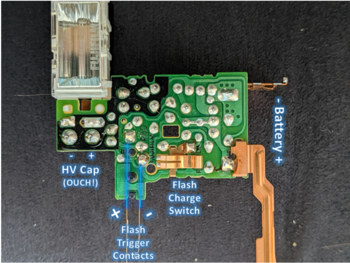
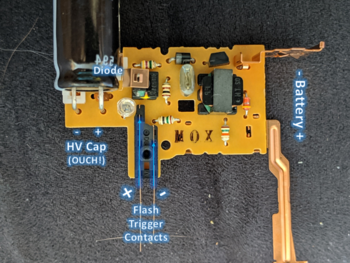
Disposable cameras use a simple but extremely clever switching converter to charge the 330V capacitor from a 1.5V source. They use a very small pulse transformer to generate the large ionization voltage required to start conduction of the xenon within the flash tube. Power converter startup is accomplished via a pushbutton, and in some models proceeds until the flash is fired and in some models the button must stay depressed until the capacitor is sufficiently charged, both models indicate capacitor voltage via an LED or gas lamp indicator. To save money, the trigger is a simple pair of copper contacts that complete the circuit from the pulse transformer to ground.
Power Supply and Trigger
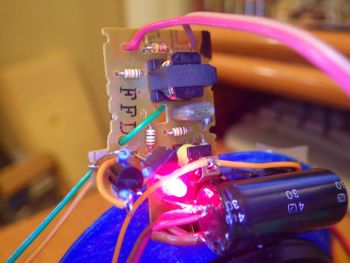
For now these will just be the disposable camera board with the beefiest transformer that I can find. Charge times will be slow because there will be three capacitors instead of just the usual single cap.
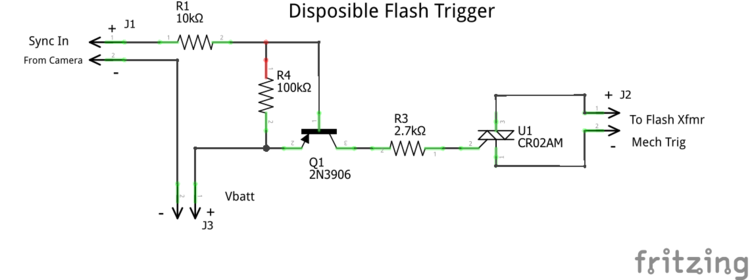
Triggering is accomplished by an SCR tied to the PC-Sync output of the camera. Due to the sensitivity of the gate of an SCR/Thyristor, it is necessary to buffer this with a PNP transistor. A 2N3906 is used to draw current from the SCR's base and trigger conduction when the sync signal goes low.
Strobes
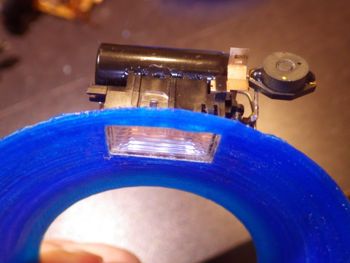
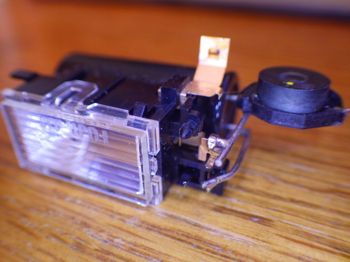
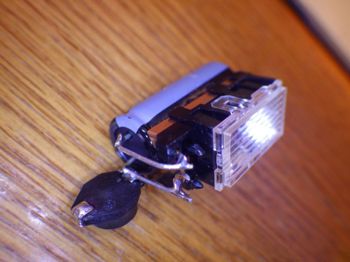
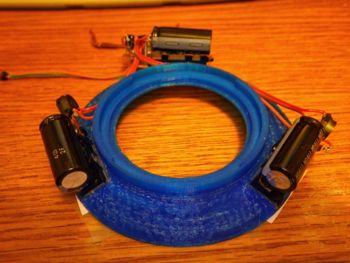
The strobe and capacitor assembly have been harvested from the disposable cameras. The capacitor is glued to the strobe housing with locktite flexible adhesive and the same glue is used to secure the strobes within the structure. Inductors are used to isolate the capacitor/strobes from the power supply to avoid tubes from stealing each other's pulses and exploding.
Brightness Calculation
Energy in flash (1/2) * 120e-6 * 330^2 = 6.534 joules
Assume somewhat poor efficiency of 30 Lumens per Joule 6.534 * 30 = 196 Lumens per strobe x3 strobes = 588 Total Lumens
Structure
Ring
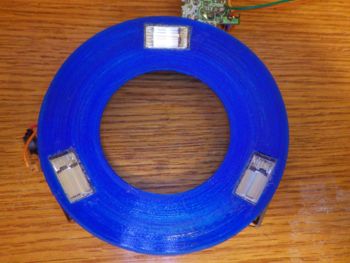
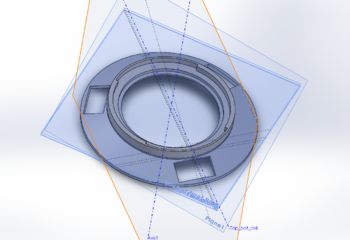
The ring structure was based on the LED version but redesigned to include the proper hole pattern.
Mount
Currently the trigger SCR and interfacing PNP transistor are piggybacked onto the stock power supply and trigger board mounted to the topmost strobe. However, the AA battery and holder are currently floating with no home. I would like to design a buck converter to take a lipo down to the required 1.5V or re-design the power converter to run well off of 3.7V as AA batteries are bulky and do not perform well under cold conditions.
Results
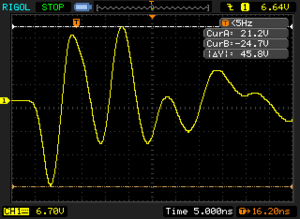
It's WAY too bright for macro work, though it would work well for classical/portrait photography. At the very least a piece of printer paper has been placed over each strobe to dim it slightly. I really need to add a quench circuit to redirect and interrupt the current path slightly with a programmable (if manual) delay. A 555 pulse generator could work well here.
Slideshow of Images Taken Using The Ringflash
